
Planes of the Head Explained: Loomis's Method in 3D
What are the planes of the head?
The planes of the head are a simplified map of the head's surfaces, broken into flat facets that show which way each part faces. Artists use them to understand how light falls across the face and how the form turns in space.
Andrew Loomis teaches this in the planes chapter of Drawing the Head and Hands (1956). His answer to flat, lifeless heads is to stop thinking of the head as a smooth ball and see it as a set of flat planes.
I first discovered the book in the early 2000s, and the planes method fascinated me straight away. I kept using these techniques for years. Eventually I built the planes as 3D models, mainly to help myself memorise them better. I'm sharing them here in the hope you find them useful too.
Use the viewer below to switch between the basic and the secondary planes of the head. Drag to rotate it and study it from any angle.

Why use planes instead of round forms?
Character. A perfectly round, smooth head reads as generic. A slightly angular one looks like a specific person, with distinct directions and individual proportions. Think of an older man's face, all angles and planes, next to a baby's soft, round one.
Solidity. Planes show exactly how the form turns in space. That gives the head weight and presence, and lets you light it convincingly from any angle.
The sweet spot. Too square and the head looks carved from wood. Too round and there's no visible structure underneath. Loomis aimed in between, and if in doubt, he leaned toward too much character rather than too little.
How to learn the planes of the head: basic, then secondary
Always work from the biggest shapes down to the smallest. Follow along in the viewer above and use the reference sheets for drawing practice.
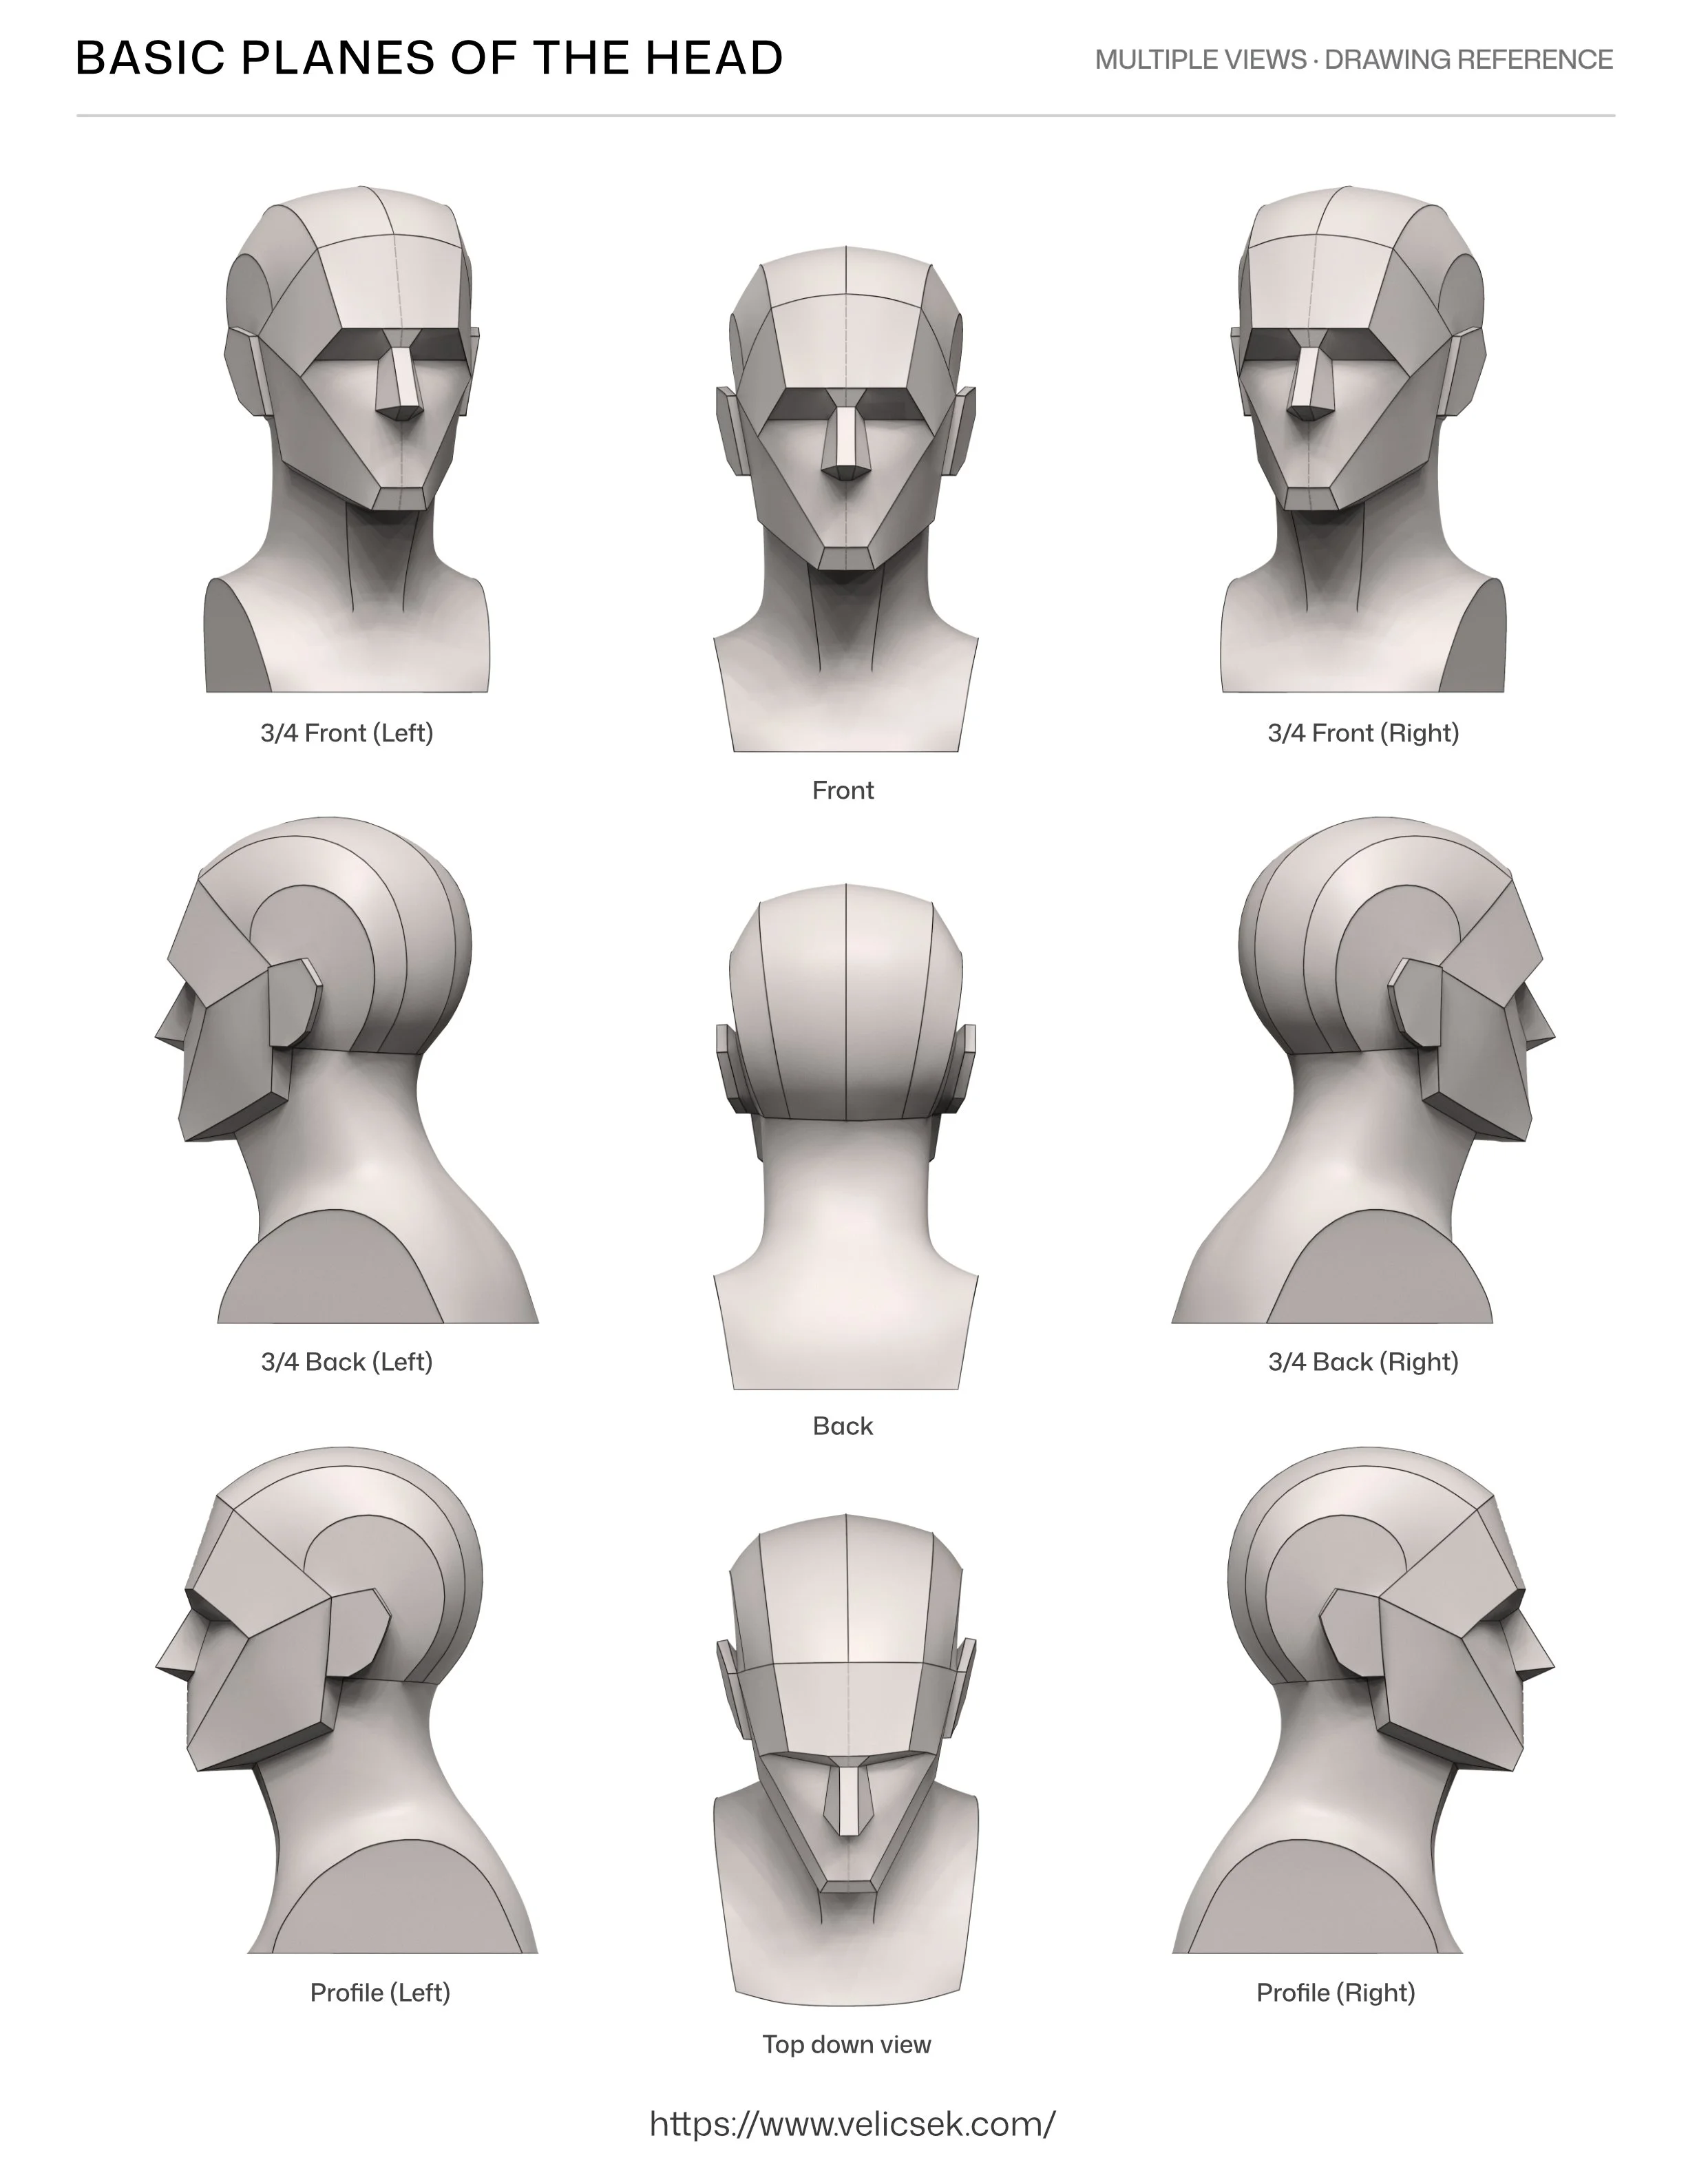
Step 1: The basic planes
The simplest version of the head: three big planes for the front, side and underside. Get these right and the head already sits convincingly in space. Switch the viewer to Basic to see it in 3D.
Step 2: The secondary planes
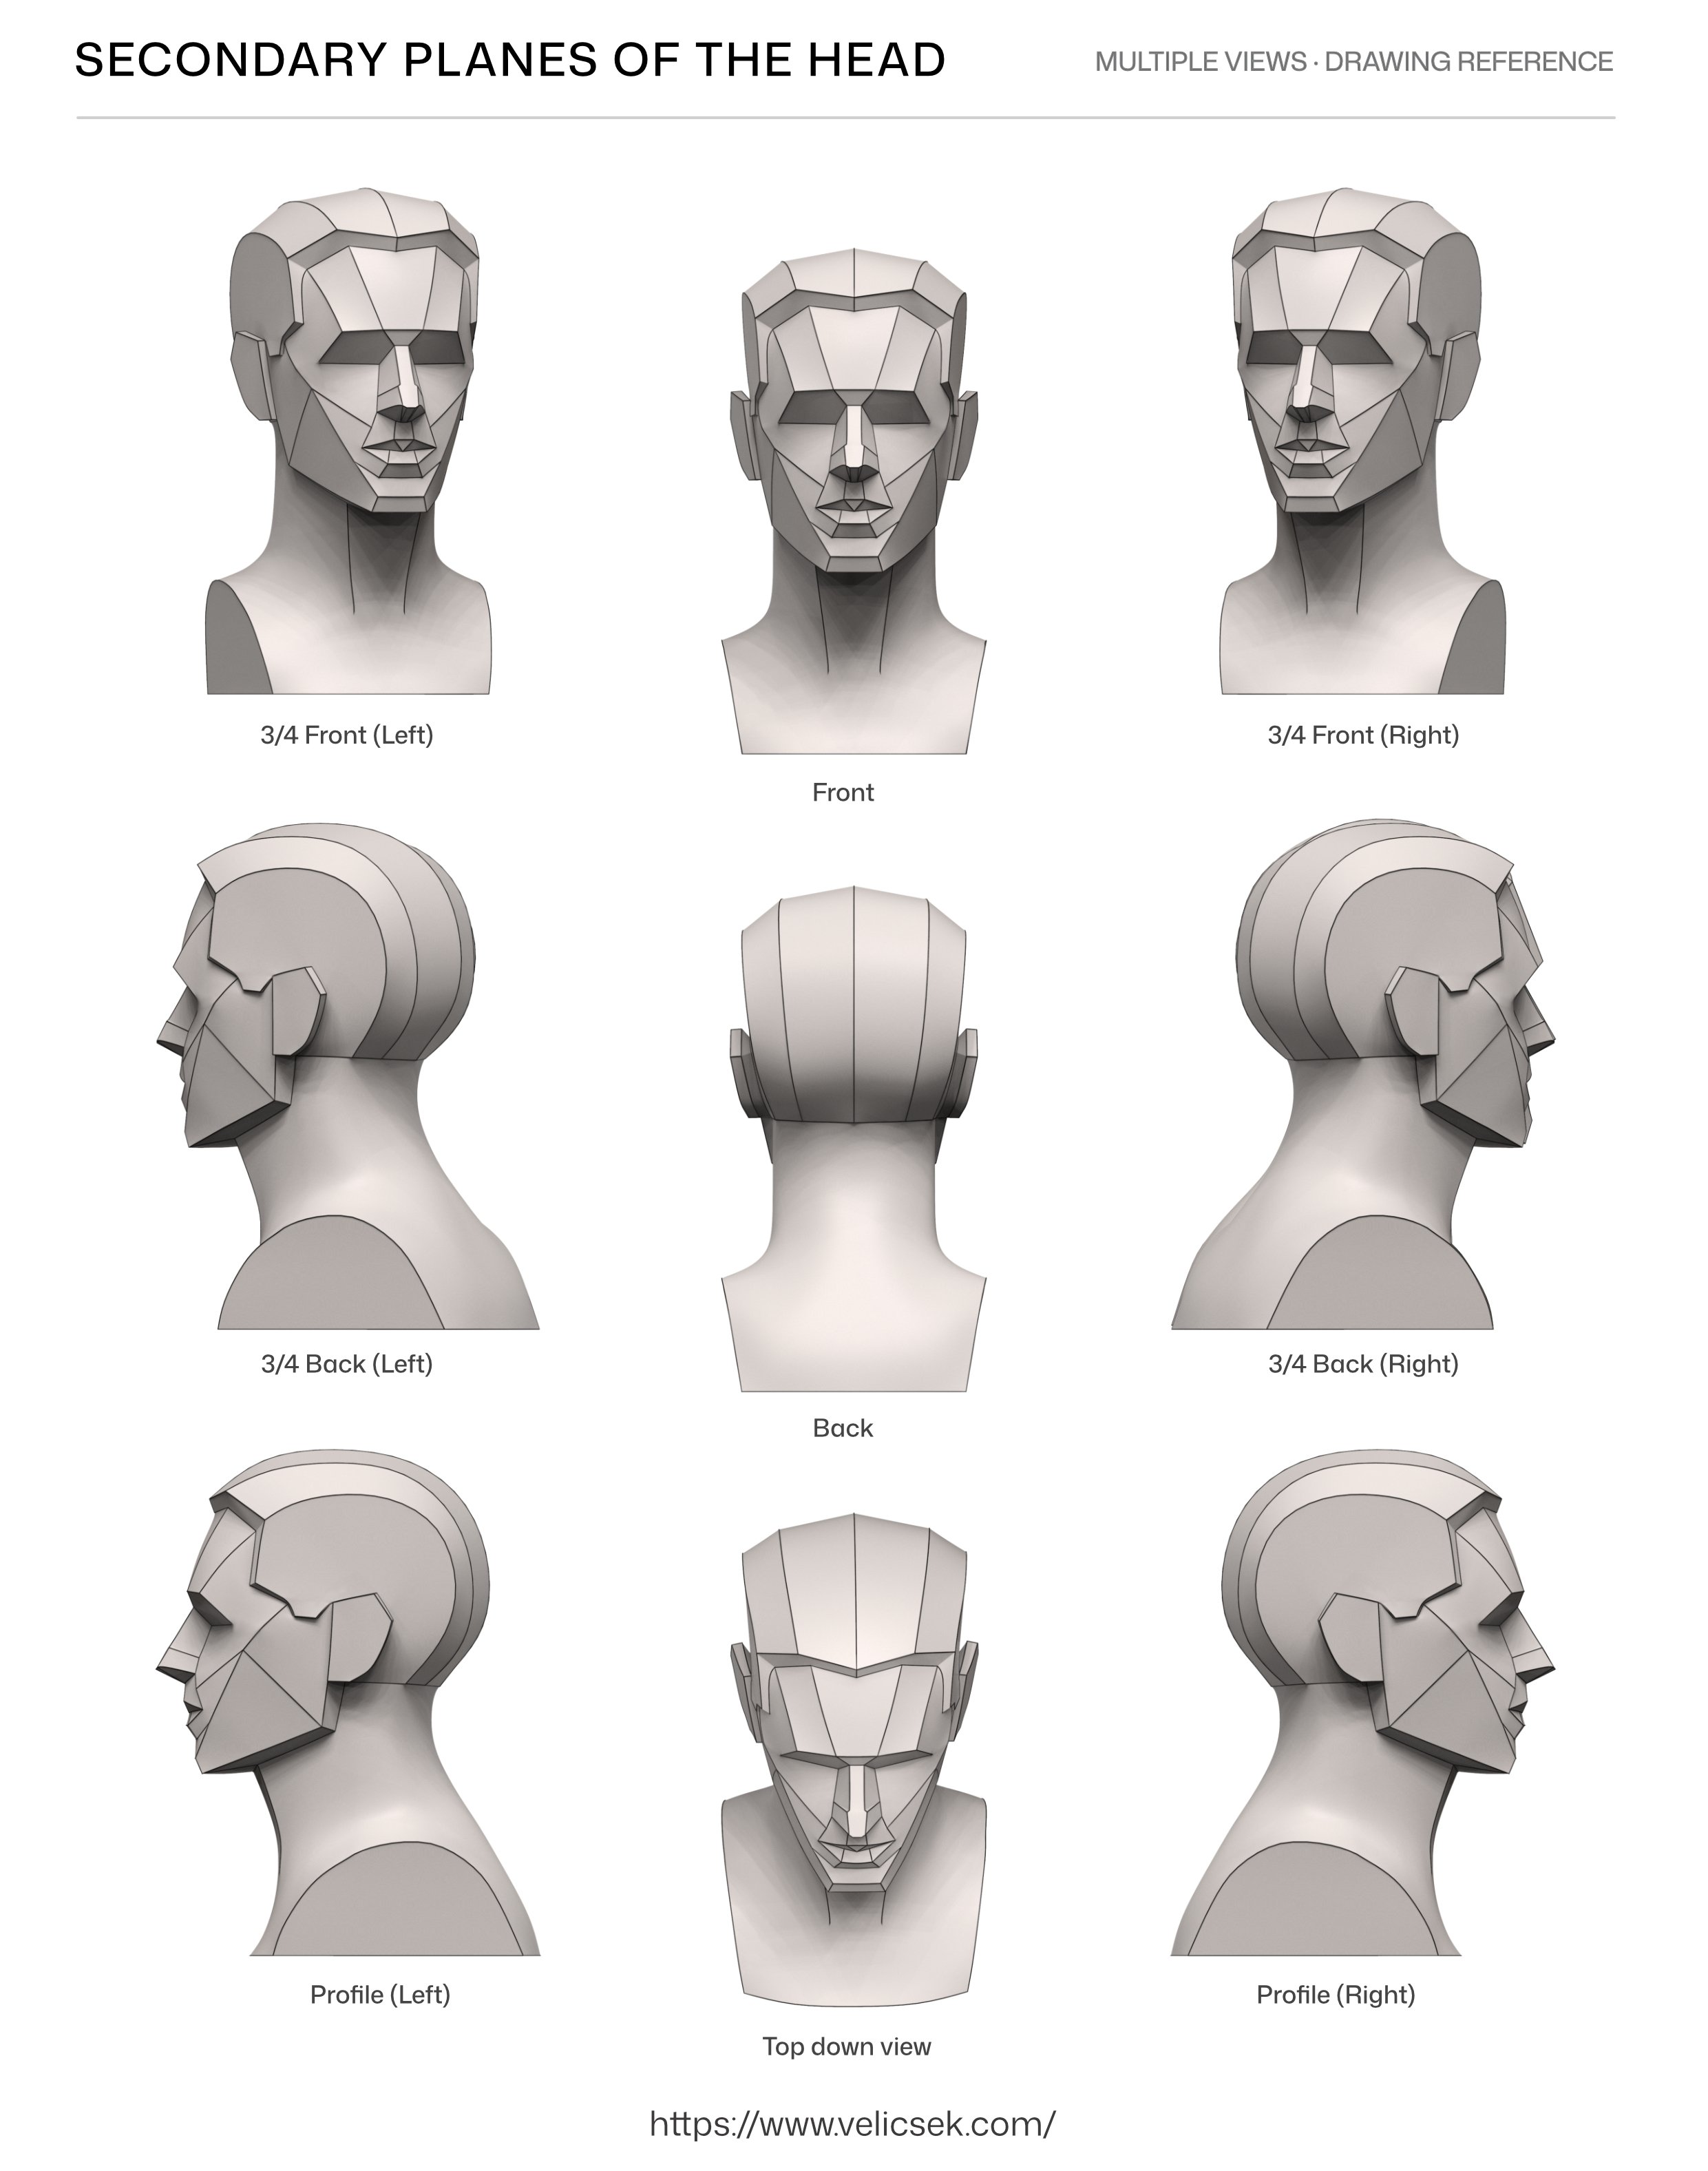
The big planes break into the main planes of the face and skull: brow, cheekbones, eye sockets, muzzle and jaw. Their angles are an average, not a rule, since real heads vary. Switch the viewer to Secondary and flip back and forth to see how the big planes split.
Loomis tells you to memorise these. I think of them like chords in music: once you know them, you can combine them into any head.
How do flat planes turn into roundness?
Keep the planes, but soften their edges just enough to lose the carved-stone look. Then let the viewer's eye do the rest:
Distance blends planes. Up close they look flat and separate. Step back and they read as smooth roundness.
Scale changes the read. Enlarge an image and it looks flat. Shrink it and the roundness takes over.
Halftones are subtle. Neighbouring planes in the halftone differ by only a tiny amount of value. Push them too dark and the form breaks into facets.
How to practise the planes of the head
Loomis warns that artists can spend days on a head before realising the construction was wrong all along. Check the planes before you touch the shading.
Draw over photos. Sketch the planes on top of photos of real heads to train your eye to see the structure under any face.
Vary the proportions. Widen the jaw, push the brow forward or change the spacing. The same base becomes a completely different character.
FAQ
What is the difference between the Loomis method and the Asaro head? Both simplify the head into planes. Loomis is a drawing method for constructing a head from imagination at any angle. The Asaro head is a sculpted plaster model by John Asaro, used to study how light falls on fixed planes. My 3D model sits between the two: Loomis's planes, but you can rotate it like a sculpture.
Is the Loomis method good for beginners? Yes. It starts from very simple shapes and adds detail step by step, so you always know what to fix first.
How long does it take to learn the planes of the head? The basic planes can be learned in a few sessions. The secondary planes take longer. Copy them from several angles until you can draw them from memory.
